It "teaches" a bead its center, desired rotation, and spacing so you never have to manually copy or enter this information anywhere. This lets you use tortured prims, sculpties, mesh, or multi-prim beads by "teaching" off-center positions or unusual rotations. The process is shown both in the video below and in the listed steps:
For version 6:
To add a bead:
- Rez
or create your full-perm bead and drag the LinkEnhancer 6.1
script into it. To avoid menu errors, give the bead a short name with
no special characters. Do NOT re-use names. Multi-prim beads do NOT
require a script in every prim -- just the one script in the root.
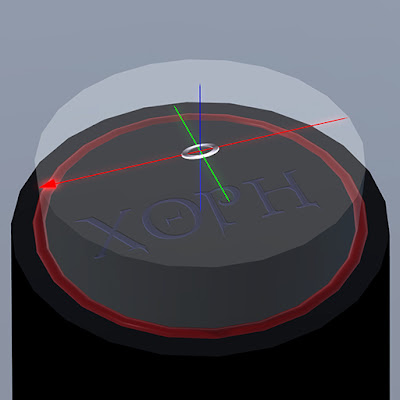
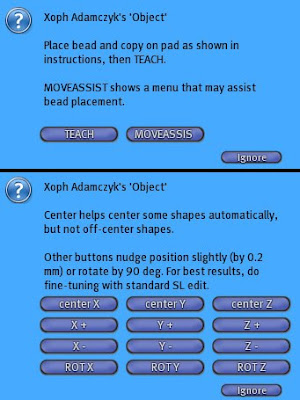
- Center the bead on the teachpad as shown in the first picture below. The red axis represents the necklace path. Note how the red and green axes pass right through the center of the bead sides, so the bead is centered where red/green/blue meet. You can click the bead to get a "Move assist" menu for some auto-position and nudging commands that may help you with centering.
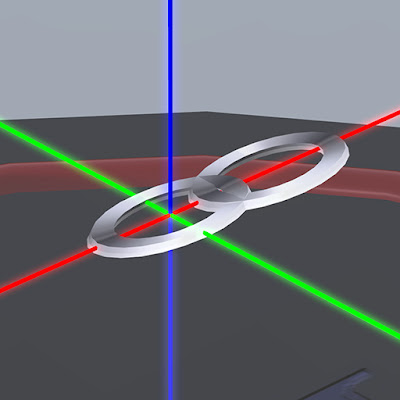
- Use SL's "shift-drag" copy technique to duplicate the bead, and place the one you are dragging just down the teachpad's red axis, next to the centered bead, as shown in the second image below (hold shift in SL's edit mode, click the bead, and drag while holding shift). Adjust the dragged bead until the spacing matches the separation you want during rezzing.
- "Touch" the bead (the one centered on the teachpad), and then click TEACH in the menu that appears. This stores some values in the bead. (If successful, it announces information in chat. In case of error messages, repeat the steps.) If you TEACH more than once, the second one should chat an error. If you intentionally want to teach again, for example, to change spacing, then you must first go back to step 3. If the bead does not respond to touch, wait a minute and retry because it may be a slow script startup (you did put the script in, right?).
- "Take" the centered bead or "take a copy" and then put it into the Beadrez object's content folder (in Edit) where the example beads are. Permissions may appear to change, but this is only temporary (see FAQ about full perm necklaces).
Scaling: It's possible to save time and improve accuracy if you are comfortable with the scalebeads command. Because beads can be resized on rez, you can use enlarged beads on the teachpad to help you place them accurately and easily. Also, this saves you the work of prepping multiple resized versions of the same bead. (Of course, beads can never be scaled below SL limits).
Naming: Use short bead names with no special characters. The teachpad changes the name to include a space value, but you will continue to use the original shorter name when referring to the bead in Beadrez. The short name must be different for all beads even when they are just copies of the same bead with different spacing. (You can manually specify different space values later with the space command, so you don't need multiple bead versions that only differ in spacing).
Spacing: You can skip step 3 if you want to manually set spacing, either by using the space command before rezzing, or by changing the name manually to add the spacing in brackets {}.
Manual entry: There is a way to specify spacing, offset, and rotation manually, for experts on building and coordinates. See the command reference that comes with Beadrez.

Above: A bead (link) centered on the Teachpad.

Above: Close-up, with a second copy of the link giving default spacing for this bead. Notice how the axes pass through the link edge centers, for a well-centered bead.

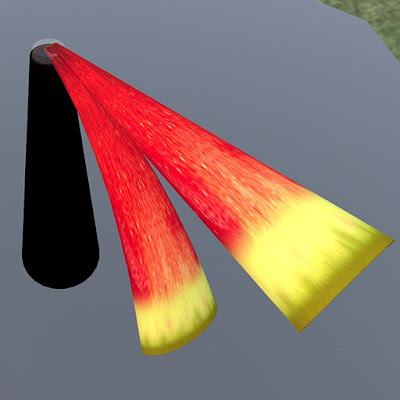
Above: to prepare a skirt panel instead of a necklace bead, place the panel tip on the red axis (skirt panels are usually cylinders with taper, profile cuts, and hollow). In the picture above, flexi has been enabled for one panel but not the other.

Above: Menus for bead setup on Teachpad.
